Posted on

A Bushwalker’s Guide to Pain-free Walking

Top tips for preventing and managing injuries.
Wallking

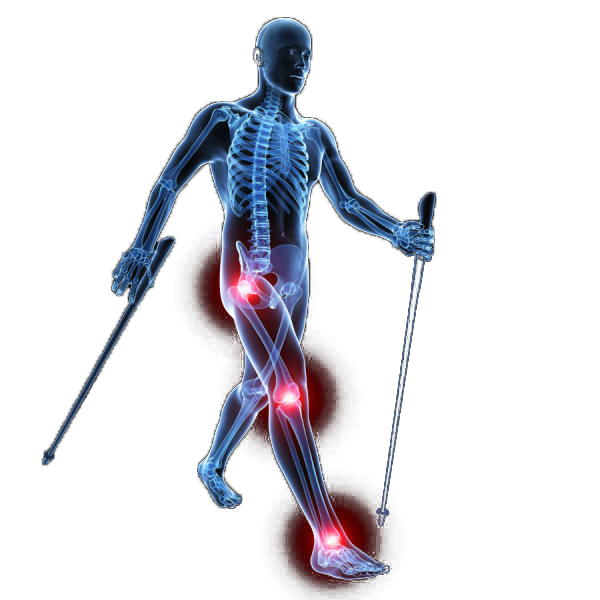
We asked Lauren Campbell, physiotherapist, and director at The Optimal Health Lab to give us some advice on avoiding and dealing with common ankle and knee injuries often suffered by bushwalkers. Here are her top tips:

Appropriate footwear

With such a rapidly growing footwear market, the numerous brands, models, and designs of walking shoes can be overwhelming! How do we even know we are in the best shoes for our feet? As everyday consumers we are not expected to know it all, so here are a few tips to help with your choice:

  • All shoes have different purposes – for instance for tennis, running, climbing or bushwalking.
  • Different shoes for different feet – shoes range from lightweight and neutral to heavy and more structured. Your type and choice will depend on your specific body type and individual needs, previous injury history, current pain/discomfort, etc.
  • Fit and function – The length, width, and depth are incredibly important. A factor often overlooked is function. Function determines how the shoe moves with your foot during gait and how it may assist your gait - for example, how much it may support or resist certain movements (such as pronation)
  • Injury risk – Ill-fitting footwear that does not address the above factors, could increase your risk of injury. Adequate support and cushioning, good sole grip, and fit and function, are always important considerations when choosing appropriate footwear.

The best way to ensure a good fit is to have your shoes fitted by a trained shoe store attendant or to see a podiatrist who has knowledge in the area. 

Ankle Sprains

Ever had that niggle in your ankle that never quite went away? And all it took was a slight twist? That niggle could actually be a little more serious than you think.

Ankles are incredibly important and complex joints. They have a big role as they form the connection between our leg bones and foot bones. They are held together by an intricate array of ligaments and supported by tendons and muscles. An ankle sprain or twist can cause disruption and damage to any of these structures, and often go unnoticed for a while.

Noticeable symptoms of damage may include pain, swelling, stiffness, bruising and inability to walk. If left untreated, our body ‘glues’ things back together in the way it knows how, but that is often not the best way. Our ankles may become weaker and more flexible, which makes it easier for an injury to occur again.

It is thought that these injuries and their symptoms are progressive. This is where rehab is crucial. Your recent major ankle sprain may have been avoided entirely if the last couple of little ones were addressed early. Your biomechanics - the way your body moves and functions - could also be contributing to your overall risk or reason for sprains.

As the saying goes, prevention is the best cure, so book an appointment with your podiatrist for a thorough biomechanical assessment to reduce your risk of ankle problems.

Knee pain – why up is better than down hills

Bushwalkers often present to physiotherapists with soreness on descending hills but are bemused/ confused that they can ascend hills with less pain. This is why this is a common presentation to our clinic and what factors may be involved.

When you are descending hills or walking downstairs, it requires your knee joint to perform a mini single leg squat to lower the other leg to the next step and/or patch of a walking trail. This single leg squat movement is stressful on some structures on the front of your knee, like Hoffa’s fat pad, and for the cartilage which lines the back of your patella (knee cap). It can also require your knee to bend at a larger angle than you are prepared for, which can put a strain on any structures within the knee joint itself. This could include any meniscal injury and/or any osteoarthritis in your knee compartments. Conversely, when ascending a hill, there isn’t the degree of stressors on internal or frontal knee structures, simply because you don’t need to perform a single leg squat with every step.

So what factors are involved in reducing pain around knees when heading downhill… because it’s certainly not all bad news and we don’t want you to despair… there are answers and help available.

Muscle strength is an important factor. With enough muscle strength supporting your knee complex, your knee structures are not stressed to a painful level. These muscle groups include your thigh, hamstring, glute and calf muscles. Strengthening these muscles at home and/or through some gym work or pilates may be part of your knee pain management plan.

Sourcing appropriate footwear for walking and considering your ankle stability and foot anatomy can ensure that your foot lands in the evenest way possible on the ground. Lastly, and most importantly, if you have had previous injuries or are experiencing pain when walking/climbing, you need an effective diagnosis and treatment plan from an experienced physiotherapist on the exact cause of your pain. A physiotherapist's aim is to keep you moving rather than removing you from all activity when dealing with knee pain. There are numerous benefits to bushwalking and we want to keep you on the tracks and trails.
Posted on

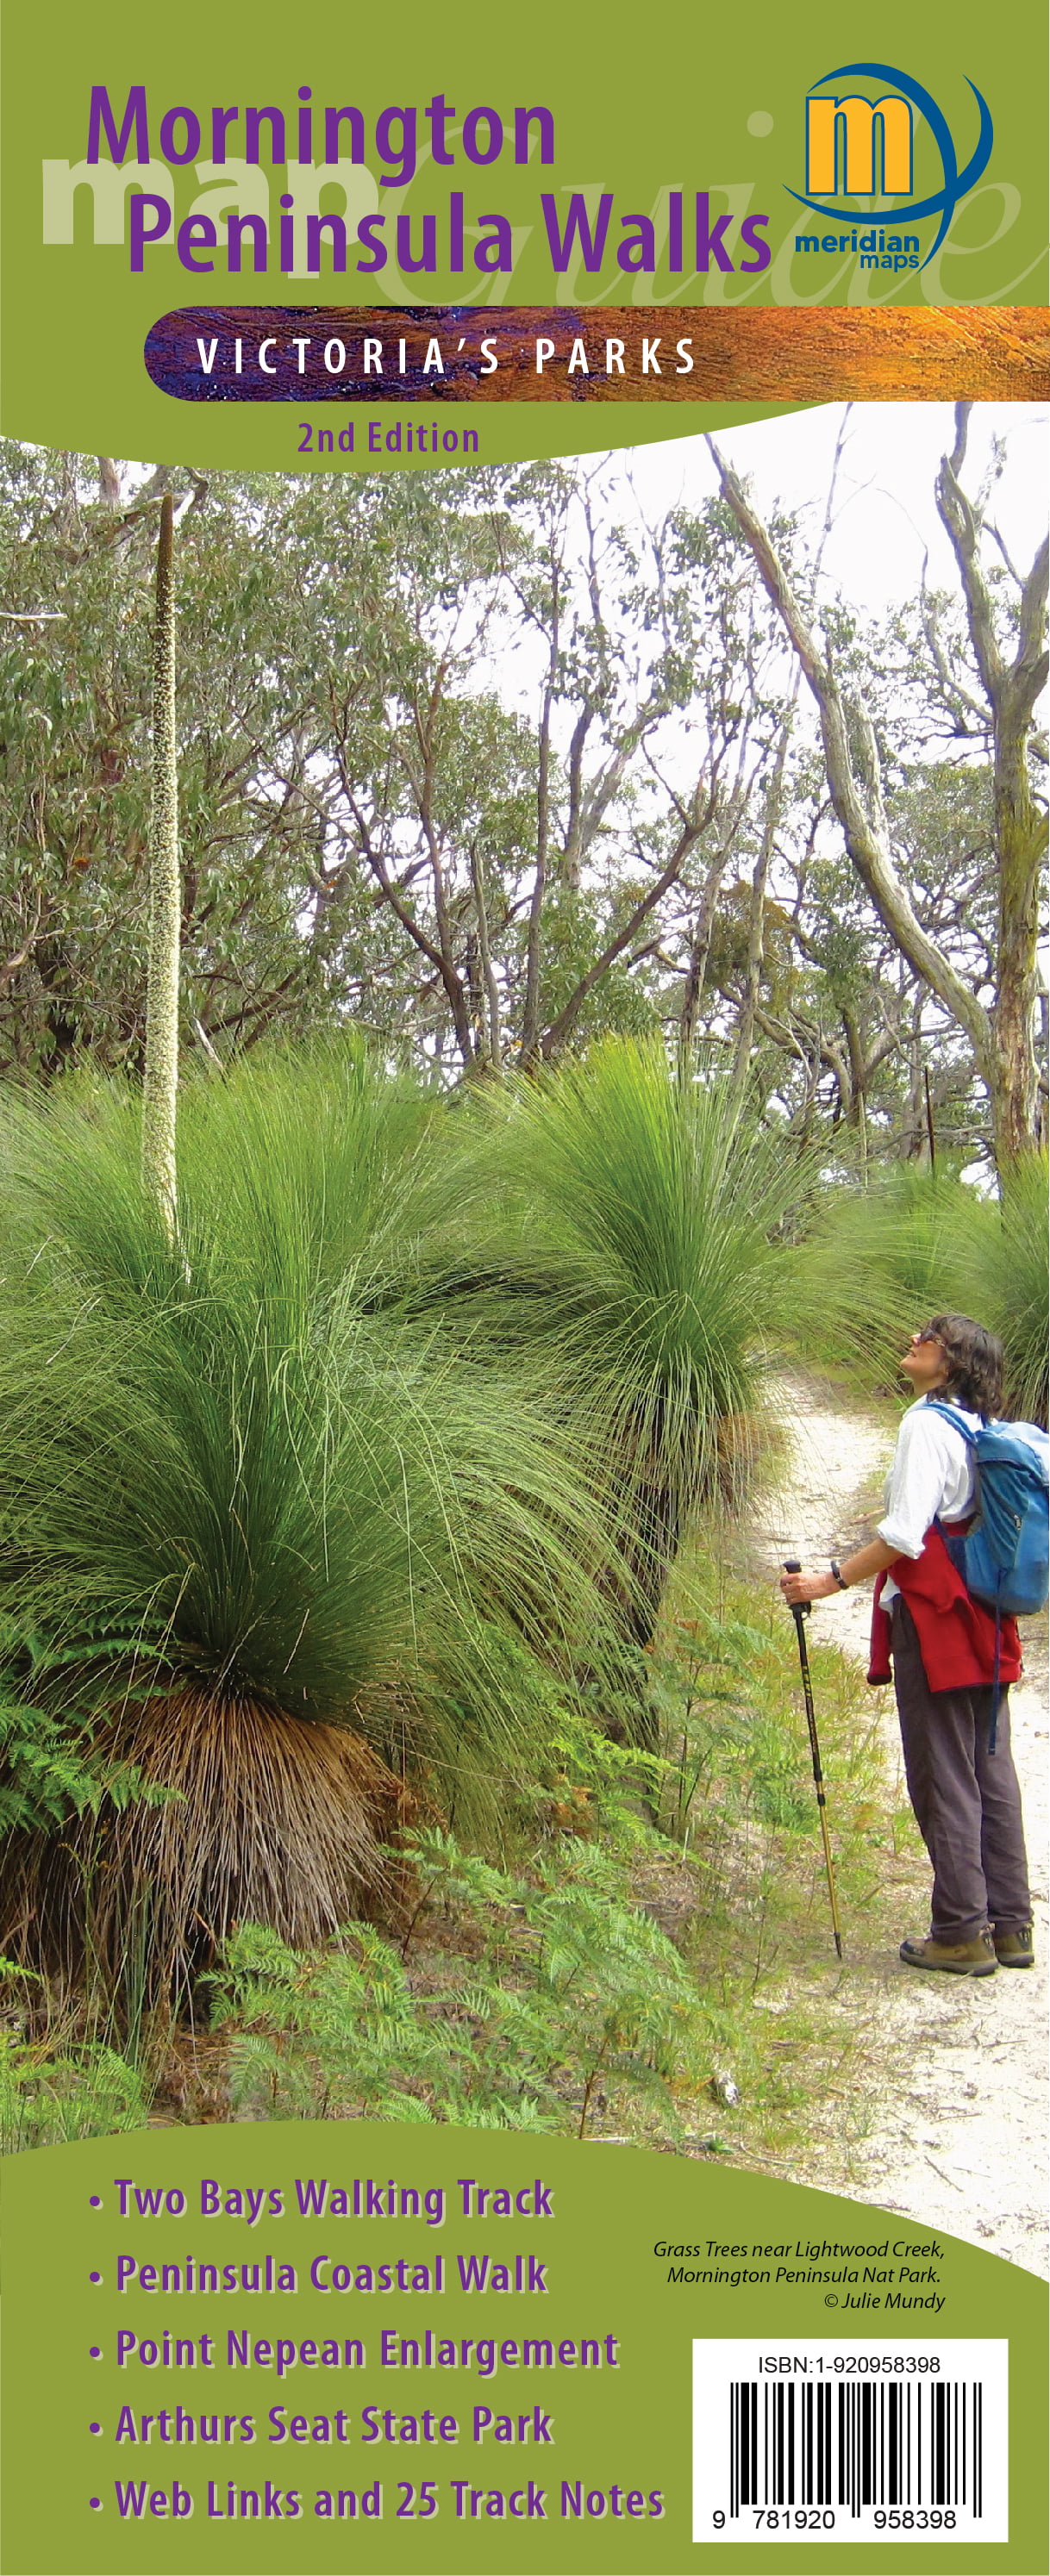
A New Map from Meridian – Mornington Peninsula Walks Map Guide 2nd Edition

Mornington Peninsula Walks is so much more than a map: as well as being a comprehensive guide to many walks, it also offers a wealth of information to those wishing to explore this marvelous area which is easily accessible from Melbourne. Notes on flora and fauna, local history and public transport access are all provided. There is even a list of suggested reading and websites for visitors to the region. It is difficult to see what additional information could be packed into this publication.

Mornington Peninsula Walks (published Jan 2021) contains some information from the older Mornington-Arthurs Seat Map (2001), but has been so extensively updated and reworked that it is basically a new guide. It covers Point Nepean National Park, Mornington Peninsula National Park, Arthurs Seat State Park, Two Bays Walking Track and the Peninsula Coastal Walk.

Making a walk map of the Mornington Peninsula can be ‘awkward’ because a single map scale and orientation is not appropriate for all areas. Meridian has overcome this with two clever ideas: firstly, four of the six maps are printed at 1:25,000 and two at 1:20,000 (where more detail is required). Secondly, the two coastal walk maps are oriented across the page, rather than having north at the top. Clear north pointers are provided on all maps and the grid serves as a reminder to the map reader as to the map’s orientation. This enables the guide to be quite compact, whilst offering information-packed maps at a scale that is ideal for walkers.

Over two dozen walks are mapped and briefly described. Walk difficulty ratings (from easy to difficult), distances and times are provided. The times are generous, being equivalent to a walking speed of 2-3 kph, and range from one-hour family rambles to the rather more challenging 26km Two Bays Walking Track, with which many bushwalkers would be familiar. The information on the maps is comprehensive: parking and picnic areas, toilets and shelters, patrolled beaches, emergency marker locations, views and points of interest. The maps are peppered with interesting snippets of history and references to other recreational activities. A UTM grid is discretely under-laid on all maps for those wishing to use it; the 10m contour interval provides a good sense of the topography.

Printed copies of this publication can be purchased from local and online retailers and through Meridian Maps; all six maps are also available in georeferenced electronic form through the phone app Avenza. Having the electronic version of these maps and using the GPS capability of the phone means you always know exactly where you are. This is the beauty of having the maps available both as paper and on a phone app that has full navigational ability.

This publication is ideal for all types of visitors to the wonderful Mornington Peninsula – from a family that enjoys short walks during their holidays, through to serious bushwalkers who’d like to try an iconic Peninsula walk. Mornington Peninsula Walks is an invaluable resource; I have not seen any other walk publication of this area which is as detailed, easy to read or as comprehensive.

Review by Andrew Robinson
(Bushwalker, Camper, Mapping and Navigation trainer)

Posted on

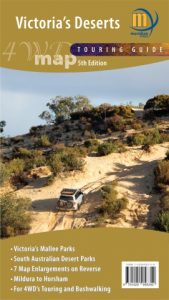
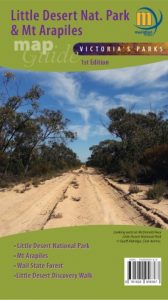
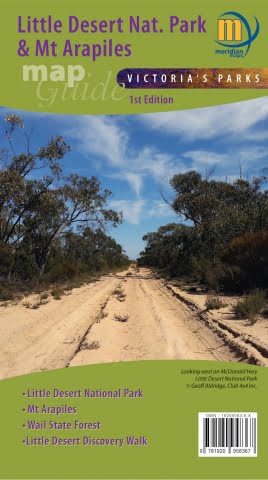
Little Desert National Park & Mt Arapiles Map Guide, 1st Edition and Victoria’s Deserts 4WD Touring Map, 5th Edition

The popular Victoria’s Deserts 4WD Touring Map, now in its 5th edition, is a ‘must’ when planning a trip to the beautiful deserts of Victoria. Released in August 2020, this is the map I’d spread out on the table to research everything this area offers. The main map at 1:350,000 (that’s about 3mm representing each km) is essentially a road map; it extends from the Murray south past Horsham and west across the border into South Australia. It is packed with up-to-date detail on roads, tracks and camping sites and it also highlights tourist activities such as the Silo Art Trail. There is even a list of recommended reading for visitors to the region.On the reverse side of this large map are enlargements of seven popular areas, including Wyperfeld and Little Desert National Parks, Pink Lakes, Mt Arapiles and the northern Mallee. Scales of 1:100,000 (10mm per km) to 1:175,000 (about 6mm per km) are generally used; most walkers would find larger scales more helpful, although one could navigate from the enlargements at a pinch. Relief shading is used to illustrate topography, but, except for the Mt Arapiles map (1:50,000), no contours are shown – understandable on medium-scale maps of a relatively flat desert region. The grid is in Latitude/Longitude, which could be a challenge for those who use MGA grid references. These enlargements are also packed with clear, easy-to-read detail relevant to any visitor. 

If the Little Desert, Mt Arapiles and the Wail State Forest are your areas of specific interest, then the new, smaller format Little Desert National Park & Mt Arapiles Map Guide is for you. Whilst essentially offering the same level of detail as the Victoria’s Deserts enlargements, these maps have slightly larger scales; the Mt Arapiles section is well-detailed at 1:20,000 and includes contours. These maps will interest walkers, as they show walking tracks in addition to vehicular tracks and roads. Again, lots of visitor information is included.

All of these maps are also available in georeferenced electronic form through the phone app Avenza. Once your trip planning’s completed using the paper map, you can hit the track with the electronic version. The GPS capability of the phone means you always know exactly where you are. This is the beauty of having the maps available both as paper and on a phone app which has full navigational ability. Interestingly, the electronic Little Desert map has an MGA-UTM grid overlayed, unlike the paper version.

As there are few maps of these fascinating areas, these publications would be an invaluable tool for those planning an adventure in this region post-COVID. As a bushwalker, when I’m on the track I prefer to use a large-scale map with contours and some indication of vegetation cover and other topographic features. However, for a touring or camping trip, I’d definitely use these paper maps for planning – this is where the Victoria’s Deserts maps really come into their own.


Andrew Robinson

(Bushwalker, Camper, Mapping and Navigation trainer)

  • Victoria’s Deserts 4WD Touring Map, 5th Edition [RRP $14.95]; pdfPress release
  • Little Desert National Park & Mt Arapiles Map Guide, 1st Edition [RRP $8.95]; pdfPress release
Posted on

Use lockdown time for navigation practice!

“Practise, practise, practise’’ is a mantra well known to participants of Bushwalking Victoria’s Smartphone navigation course.

Bushwalkers appreciate the need to hone their skills if they want to use a GPS or smartphone as a navigation device in the bush. So they may have been surprised to recently read this article, about a walker who was lost while on a solo 4 day walk on the Arizona Trail, in an area with numerous side trails. We asked Andrew Robinson, presenter of the smartphone navigation course and map expert, to share his thoughts with us. Below is his take on it and some very handy tips!

Although an experienced bushwalker, Gary Morris was using a new GPS, a Garmin GPSMAP 64st, which he had only tried out once previously. This seems akin to purchasing a new 4WD and, after a brief tryout, embarking on a solo crossing of the Simpson Desert! The article implies that Morris was not using a map and compass as a back-up. After being rescued, Morris’ mapping software was blamed for him becoming lost; there was no acknowledgment that his lack of experience with the new device may have contributed.

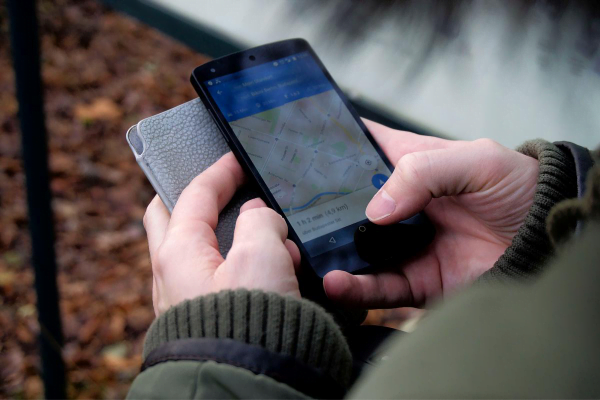
COVID-19 lockdown is an ideal time to “Practise, practise, practise’’ while walking the streets within 5km of your home. You can’t really get lost there! Start by updating the software of your GPS/Smartphone. Many of the navigation apps, eg. Avenza, maps.me, Terra Map and many others, have added new features and updated their maps. You now have time to explore the online manuals and help files. It’s amazing what features and tricks you can find there. Then hit the streets and try navigating to waypoints, tracking, following a route, etc. This adds interest and enhances skills on the daily walk with the dog.

A couple of tips:

  • The compass on most GPS\Smartphones uses a magnetic sensor. Just as with a magnetic compass, those functions on the GPS/smartphone which use the magnetic sensor will be affected by metallic objects such as vehicles, metal fences, etc. These functions include the compass (obviously!), but also one which indicates direction of travel and one which orients the map in the direction of travel. In a few apps (e.g. Terra Map), one can switch from a magnetic compass to a ‘GPS’ one. Direction is then determined from GPS points, but this only works when one is moving.
  • Some GPS’s have a “Lock on Road” function. Turn it off! This function allows the GPS to lock its position pointer onto the nearest road or track. It can cause major confusion if there are lots of tracks in the area, or if you want to go off track. It is sometimes set ‘ON’ by default in a new GPS. Interestingly, Morris’ Garmin GPSMAP 64st had this feature: I wonder if he knew enough to turn it off.
Posted on

How to print a paper bushwalking map from an electronic version

Over recent years, many map producers have provided their map collections in electronic form. Only a limited number of these maps are available in a printed form. Geoscience Australia ceased printing its 1:250,000 topographical maps late in 2019. This is not a major problem for bushwalkers in Victoria: 1;250,000 (1cm to 2.5km) is not a scale most walkers use, because these maps provide insufficient detailGood detailed maps covering Victoria at 1:25,000 (1cm to 250m) and 1:50,000 (1cm to 500m) are available in electronic form and many are also available as paper maps. These scales are far more useful out on the track.

Paper maps can be purchased from suppliers such as Vicmap (mainly 1:50,000), Spatial Vision and Meridian – see Finding Maps for Walking in Victoria for a detailed list of sources, including shopfront and online suppliers.

If, rather than purchasing a paper map, you want to print one of the many electronic maps which are available from a variety of sources (including any of the Geoscience 1:250,000 maps) it’s relatively easy.

Many maps are produced in geopdf format. This allows the maps to be displayed and used in navigation software and apps e.g. Avenza. It also allows them to be easily printed to the correct scale using free software e.g. Adobe Acrobat reader. A walk leader can use an electronic map for navigation with their smartphone and carry the identical paper map.

Here are some options if you wish to have a printed copy of a geopdf map – either a whole map or part thereof.

Print the whole map:

  1. Take the geopdf file to your local printer. It will cost about $20 for an A1 sheet and a little more if you want it on more robust waterproof paper, OR
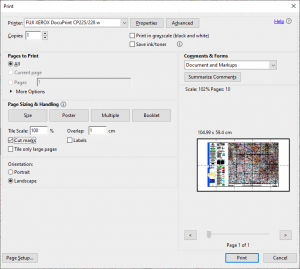
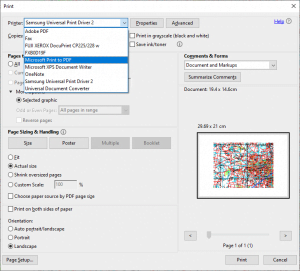
  2. Print the map as smaller tiles and stick them together. You can do this at home, using Adobe Acrobat reader. Open the required map, press ‘Print’ then press the ‘Poster’ button. Ensure ‘Tile Scale’ is on 100% and ‘Overlap’ is set at 1cm. ‘Cut marks’ should be checked to make putting the tiles together easier.

The preview screen will show how the map image will be tiled. Press print. Trim/assemble the sheets.

Print part of the map:

Open the map in Acrobat reader. Click on the ‘Edit’ menu and then ‘Take a Snapshot’. Highlight the desired area and press print. Press ‘Size’ and ensure ‘Actual size’ is checked. Your selected area will be shown in the middle of a sheet. If your selected area is larger than one sheet, you can poster print in tiles as described above.

What to do if you don’t have a colour printer:

Most modern computers can make a pdf file through the Print interface. Instead of printing to a physical machine, you can make a pdf file instead. Use the above instructions and just change the setting under ‘Printer’ to the pdf driver.

You can change the paper size to A3 under ‘Properties’ if you have a larger area to cover, or want bigger map tiles. Place the saved pdf file on a USB thumb drive and take it to your local self serve colour photocopier/printer.

Poster printing is a quick and cheap way to produce reasonable-quality larger maps from geopdf’s. You can use waterproof paper too, if you wish: ‘Rite in the rain 8512’ paper can be used in a laser printer; it’s about 30 cents an A4 sheet.

When printing from electronic maps, please remember to respect copyright. Personal use only.

Author: Andrew Robinson

Date: 06 August 2020

Posted on

Bushwalking Manual

Bushwalking Victoria has published an updated Bushwalking Manual that provides guidelines and information for safe, enjoyable community-based volunteer bushwalking in Australia.  The manual includes contributions from other state and territory peak bushwalking organisations.

Feedback and suggestions are welcome and can be provided using links on the feedback page.

Bushwalking Victoria acknowledges and thanks the Department of Environment, Land, Water and Planning for providing funding for the development of this manual.

Posted on

Update on snake bites in Victoria

While the chances of a snake bite are fairly low the consequences of a snake bite can be very serious or even fatal. Most venomous snake bites in Victoria are from tiger or brown snakes.

There are 100 to 200 severe cases of snake bite that need antivenom in Australia each year. Half of all cases involve people interfering with snakes and one in ten cases are snake handlers. More about statistics are here.

Here is a fact sheet about snake bite from Safer Care Victoria.

Prevention

Snakes may occasionally be encountered while bushwalking. Unprovoked, snakes rarely attack humans. Therefore, do not disturb a snake in your path and alert other members of your party to give it a wide berth. Always wear stout footwear and be observant. Take particular care in warm weather, long grass, hollow logs, near water or rocks in sunny positions.Watch and look out when stepping over logs or gathering firewood.
Wear long trousers and/or gaiters in areas where snakes are prevalent. Snakes cannot hear but they can detect vibrations through the ground, so walking heavily (stomping) may warn them of your presence and encourage them to flee from your path. When camping, use a tent with an integral floor and always zip up the doors. Use a torch at night.

Recognition

While some victims know they have been bitten, some do not. Symptoms may appear 15 minutes to 2 hours after the bite and may be mild or severe, depending on the species and the bite. Symptoms include double vision, headache, nausea and vomiting, sweating, faintness, diarrhoea, chest pain, difficulty swallowing or breathing, swollen lymph glands in groin or armpit, drowsiness.

Treatment

Seek immediate medical help by calling 000 Emergency Services and advise the walker’s emergency contact person.

Many Australian snakes are venomous so follow the first aid techniques. Use a pressure immobilisation bandage and splint the limb. If the person was bitten on the torso, make sure bandaging doesn’t restrict their breathing. Here is a very good fact sheet with photos on first aid for treating snake bites in Australia. The use of Aero Form snake bite bandage with indicator is recommended as well as Setopress High Compression Bandage.   If you would like more information about where antivenom is held and stock levels, have a look here.

The principle of the treatment of snake bites is to slow the movement of the venom in the body down by keeping as STILL as possible and apply firm pressure at the entry point. 

When it bites, a snake injects venom into tissue, not directly into your bloodstream. Venom then travels from tissue fluid into the lymphatic system and will eventually flow into veins then enter the bloodstream. Applying a pressure bandage around the location of the snake bite and immobilising the patient slows down the movement of lymph fluid.

The lower leg is the most vulnerable to a snake bite when bushwalking. When someone is bitten:

  1. Immediately apply firm pressure over the bite site.
  2. Lay the victim down and keep them calm and at complete rest.
  3. Apply a broad firm bandage to the bitten area and around as much of the limb as possible, without removing clothing if this means moving the limb. Bandage as tightly as for a sprain and work up the limb to include the joint above the bite site. Bandages with indicators showing the compression applied are recommended.
  4. Immobilize the limb with a makeshift splint.
  5. Constantly observe the patient for shock and respiratory failure. Dispatch other members of the party with knowledge of your location to bring outside help to transport the patient.
  6. If external help is unavailable, the best option is probably to rest for a day or two then proceed to the nearest civilisation taking care to minimize stress to the patient.
  7. Do NOT remove bandages or splints on reaching medical care, the treating doctor will make that decision.

DO NOT deliberately disturb or try to kill a snake.
DO NOT walk in sandals or thongs.
DO NOT cut the location of the bite.

DO NOT wash the skin – traces of venom left behind might be needed by medical personnel to identify the snake

DO NOT apply an arterial tourniquet.
DO NOT attempt to suck the poison from the site of the bite.

Here are good first-aid tips for all kinds of bites and stings in Victoria.

Here is a good video on snake-bite first aid: