Over recent years, many map producers have provided their map collections in electronic form. Only a limited number of these maps are available in a printed form. Geoscience Australia ceased printing its 1:250,000 topographical maps late in 2019. This is not a major problem for bushwalkers in Victoria: 1;250,000 (1cm to 2.5km) is not a scale most walkers use, because these maps provide insufficient detail. Good detailed maps covering Victoria at 1:25,000 (1cm to 250m) and 1:50,000 (1cm to 500m) are available in electronic form and many are also available as paper maps. These scales are far more useful out on the track.
Paper maps can be purchased from suppliers such as Vicmap (mainly 1:50,000), Spatial Vision and Meridian – see Finding Maps for Walking in Victoria for a detailed list of sources, including shopfront and online suppliers.
If, rather than purchasing a paper map, you want to print one of the many electronic maps which are available from a variety of sources (including any of the Geoscience 1:250,000 maps) it’s relatively easy.
Many maps are produced in geopdf format. This allows the maps to be displayed and used in navigation software and apps e.g. Avenza. It also allows them to be easily printed to the correct scale using free software e.g. Adobe Acrobat reader. A walk leader can use an electronic map for navigation with their smartphone and carry the identical paper map.
Here are some options if you wish to have a printed copy of a geopdf map – either a whole map or part thereof.
Print the whole map:
- Take the geopdf file to your local printer. It will cost about $20 for an A1 sheet and a little more if you want it on more robust waterproof paper, OR
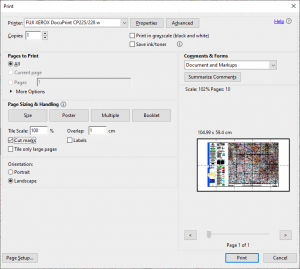
- Print the map as smaller tiles and stick them together. You can do this at home, using Adobe Acrobat reader. Open the required map, press ‘Print’ then press the ‘Poster’ button. Ensure ‘Tile Scale’ is on 100% and ‘Overlap’ is set at 1cm. ‘Cut marks’ should be checked to make putting the tiles together easier.

The preview screen will show how the map image will be tiled. Press print. Trim/assemble the sheets.
Print part of the map:
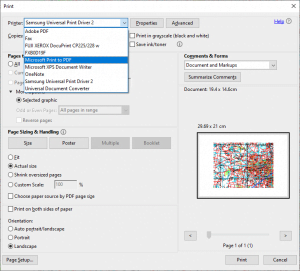
Open the map in Acrobat reader. Click on the ‘Edit’ menu and then ‘Take a Snapshot’. Highlight the desired area and press print. Press ‘Size’ and ensure ‘Actual size’ is checked. Your selected area will be shown in the middle of a sheet. If your selected area is larger than one sheet, you can poster print in tiles as described above.
What to do if you don’t have a colour printer:
Most modern computers can make a pdf file through the Print interface. Instead of printing to a physical machine, you can make a pdf file instead. Use the above instructions and just change the setting under ‘Printer’ to the pdf driver.

You can change the paper size to A3 under ‘Properties’ if you have a larger area to cover, or want bigger map tiles. Place the saved pdf file on a USB thumb drive and take it to your local self serve colour photocopier/printer.
Poster printing is a quick and cheap way to produce reasonable-quality larger maps from geopdf’s. You can use waterproof paper too, if you wish: ‘Rite in the rain 8512’ paper can be used in a laser printer; it’s about 30 cents an A4 sheet.
When printing from electronic maps, please remember to respect copyright. Personal use only.
Author: Andrew Robinson
Date: 06 August 2020
